


Cauliflower Pest & Disease Protection
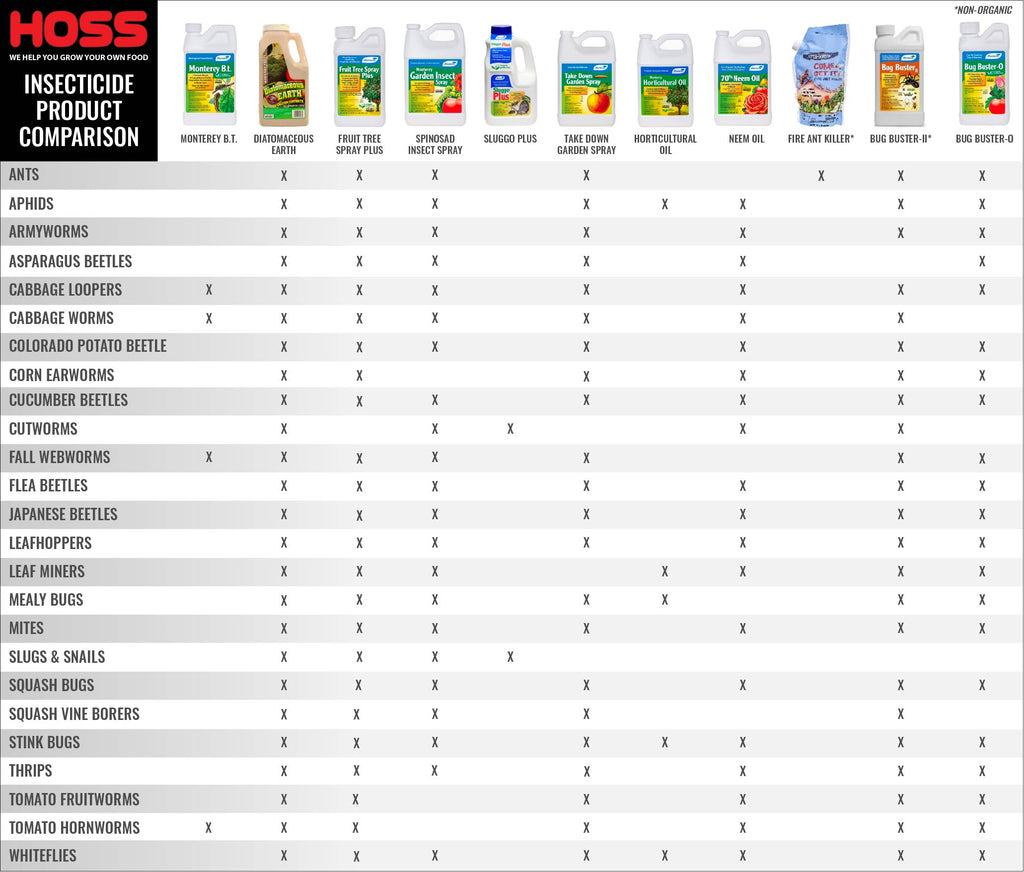
Insects
Organic Controls
Garden Insect Spray
Thrips, Horn Worms, Cabbage Looper
Horticulture Oil
Aphids, Flea Beetle, Whiteflies
Bug Buster-O
Aphids, Flea Beetle, Whiteflies
Monterey BT
Hornworms, Cabbage Looper
Take Down Garden Spray
Aphids, Horn Worms, Flea Beetle, Whiteflies
Diatomaceous Earth
Cutworms
Neem Oil
Whiteflies, Aphids
Non-Organic
Bug buster II
Aphids, Horn Worms, Flea Beetle, Whiteflies, Cabbage Looper
Treat as needed using label instructions.
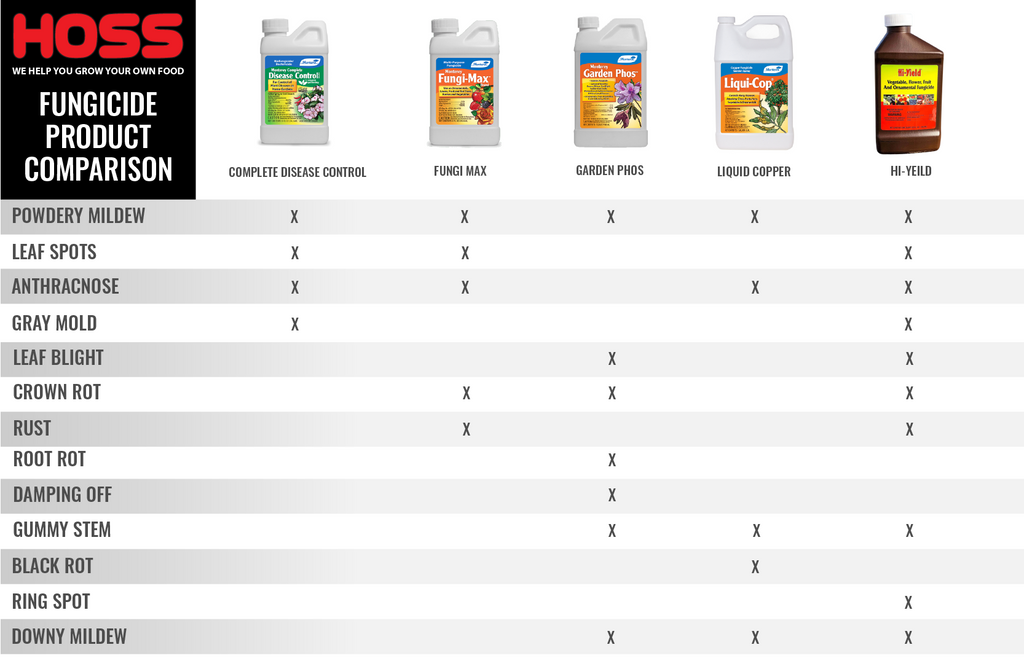
Common Diseases
Organic Controls
Complete Disease Control (Drench)
Pythium Damping-Off
Liquid Copper Fungicide
Black rot, Alternaria, Downy Mildew
Garden Phos
Pythium Damping-Off, Downey Mildew, Powdery Mildew, Alternaria
Non-Organic
Vegetable, Flower, Fruit and Ornamental Fungicide
Alternaria, Ring Spot, Leaf spot, Downey Mildew
Treat as needed using label instructions.