Left Continue shopping
Your Order

You have no items in your cart

You might also like
From $2999
Show options
From $399
Show options

Bean Growing Guide

How to Classify Beans

With the immense diversity in the world of beans, doing the research into the particular variety you are interested in and knowing its specific traits will you help you grow beans with ease. One thing you will come to learn is that beans come in all shapes, sizes, and colors so knowing how to classify these delicious garden treats will come in handy when choosing your variety.

Much like indeterminate and determinate tomatoes, beans can be broken down into 2 growth habits; bush beans and pole beans
From there, another easy way to classify beans is by when they are harvested and eaten. Immature beans that are eaten with the pod and all are called snap beans which are also commonly known as green beans. Beans that can be picked when the pods have become more mature but the beans inside are young are known as fresh shelling beans, which are also known as horticulture beans or shelly beans. Lastly, beans that are fully matured and dry on the vine or picked and dried and put up for long-term storage are called dry beans.

Bean Varieties

Bush Beans

The growth habit of bush beans is much like that of determinate tomatoes in that they only grow to 1′ – 2′ in a compact, bushy habit. Bush beans are usually planted in long, double rows that will help support each other as the plants mature side by side. However, unlike determinate tomatoes that will produce a large crop at once and be done, bush beans can continue to produce but the following crop will usually not be as substantial as the first. Bush beans are ideal for succession planting to get the highest and most consistent yield. You can also stagger your planting every 2-3 weeks to have a continual harvest of bush beans throughout the season.

Pole Beans

Pole beans are similar to that of indeterminate tomatoes in that they climb, sometimes up to over 10′ – 15′ tall. These varieties need a trellis to support their upward habit. Pole beans will produce continually throughout the growing season and many gardeners prefer pole beans because, depending on how and where you trellis, they don’t take up as much space in the garden. You can trellis using a teepee style like what is shown below but we recommend using the Hortonova Trellis Netting because it provides adequate airflow and can be easily trimmed to any size garden.

Snap Beans

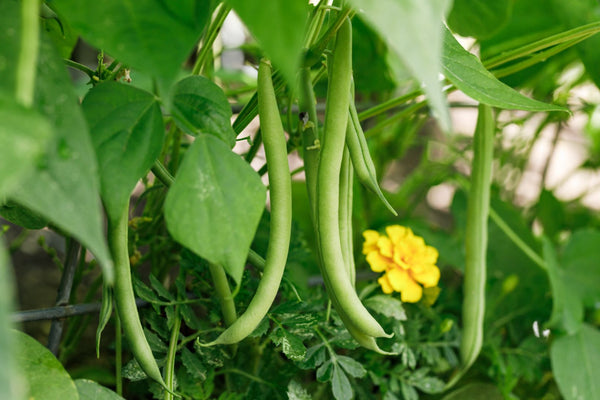
Snap beans are also commonly known as green beans, not necessarily because of their color, but because they are harvested while the beans and pods are still immature and have a “snap” sound when broken. Snap beans can come in all kinds of colors like purple, yellow, and even bright pink. Snap beans are also commonly called string beans for the fibrous “string” that runs down the length of the bean that has to be removed one by one before cooking them. Nowadays, a lot of varieties like the Tongues of Fire Bean shown below have been bred to be stringless and can be snapped and cooked right off the vine. 

Dry Beans

The main difference between dry beans and fresh shelling beans is simply that dry beans need to stay on the plant until the pods and inside beans are totally dried out. The best indication that your beans are completely dry is that you can hear them rattling around in their pods and all the leaves have turned yellow and dropped off. If you experience any rain or weather issues, just pull the whole plant out, hang, and continue to dry in a cool, dry area. 

Fresh Shelling Beans

Unlike immature snap beans that can be eaten pod and all, fresh shelling beans have to be removed from their mature pods and can be eaten fresh but are typically cooked or dried for future use. Also known as soup beans, or shellys, there are a ton of varieties that fall into this category like fava beans and edamame to name a few. Here in South Georgia, the most popular shelling bean by far are lima beans but we affectionately know them as butter beans. Fresh shelling beans should be very easy to pop open and extract the tender beans from the inside of the pods.

When To Plant Beans

Beans grow best when direct-seeded outdoors and don’t transplant well because they don’t like having their roots disturbed. While some vegetables have specific dates and windows in which to plant (like potatoes), beans have a little more flexibility to get started in the ground.

Beans don’t like cold, wet soil so if you grow beans in the spring, plant any time after the last spring frost date, when the soil has warmed to at least 48°F. For fall planting, wait until the hottest part of the summer has passed to sow your seeds. When temperatures get above 90°F – 95°F, beans will drop their blooms and not produce.

For hotter zones like HOSS down in zone 9, once the temperatures soar, that tends to be the end of our bean season depending on the variety we grow. We like to choose varieties like the HOSS Green Blaze Bush Bean for its remarkable heat tolerance. However, in more temperate zones, short hot spells likely won’t kill your plants but can halt production so depending on your zone, wait until temperatures even out to be sure they’re dead before pulling up your bean plants. 

Word Of The Day: Threshing

Threshing is the process of separating dry beans from their pods usually by using either physical force or a machine. Most small-scale gardeners don’t need the large expensive machinery that commercial growers do to thresh acres and acres of beans so it ends up that they do them by hand. If you only have a few plants, it’s likely just as easy to shell them that way but threshing is a good way to save a lot of time. The most popular way is to put the dried beans in a sack, usually burlap, and beat them with a mallet, against a wall, or stomp on them to crush the dried pods. It’s equal parts time-saving and therapeutic.

Bean Plant Spacing

Sunlight it Important

When choosing a spot to grow beans, full sun is always recommended. Be careful not to over-plant your beans because they can easily take over and become too difficult to manage and harvest. Using the HOSS Garden Seeder makes planting the right amount of beans much faster and easier. 

In-Ground Planting

Row Spacing– 3 feet
Plant Spacing– 3 to 4 inches
Planting Depth– 1 inch

Raised Bed Planting

Row Spacing– 2 feet
Plant Spacing– 3 to 4 inches
Planting Depth– 1 inch

Bean Soil, Irrigation, & Fertilizer

Soil Requirements to Grow Beans

  • Loose, well-draining soil
  • pH between 6.0 and 6.8
  • Rich in organic materials
  • Good quality compost added to the soil

Beans use naturally occurring bacteria in soil called rhizobacteria to get nitrogen from the air and then feed this nitrogen to the beans. In return, bean plants then feed carbohydrates back to the bacteria. This relationship is extremely beneficial for soil health because planting beans helps to “fix” the nitrogen levels in your garden for future plantings.

HOSS always recommends getting a soil sample to your local extension office several weeks before planting. Once you get your results, you will need plenty of time to adjust your soil accordingly and make sure your plants are getting the best nutrients possible as soon as they hit the ground.

Click here to find your local extension office.

HOSS Pro Tip

Inoculate Your Soil

If you have never previously grown legumes in the spot you choose to grow beans, we recommend using our Garden Soil Inoculant during planting to boost nitrogen fixation in your soil and boost performance. The inoculant contains millions of live rhizobacteria that will maximize yield benefits by out-competing the indigenous rhizobia for root nodulation.

Bean Irrigation Requirements

Bean plants need at least 1/2″ of water per day during the blooming period and water every day.Using drip irrigation is always recommended to be sure that your bean plants are getting moisture directly to their root system. If you’re using conventional overhead watering techniques, try and use something like the Dramm Watering Can and water and fertilize at the base of the plant to keep moisture off the leaves.

In-Ground Fertilizer Schedule

Several Weeks Before Planting

Test your soil at your local extension office.

1 Week Before Planting

After adjusting soil pH to 6.0 – 6.8, mix 1 1/2 cups per 10 ft. of row of Hoss Complete Organic Fertilizer with your soil.

4 Weeks After Planting

Sidedress 2 cups of Hoss Complete Organic Fertilizer per 10 ft. of row

Raised Bed & Container Fertilizer Schedule

Several Weeks Before Planting

Test your soil at your local extension office.

1 Week Before Planting

After adjusting soil pH to 6.0 – 6.8, mix 1 1/2 cups per 10 ft. of row of Hoss Complete Organic Fertilizer with your soil.

4 Weeks After Planting

Using the Hoss Fertilizer Injector, Mix 1 cups of Hoss Premium 20-20-20 Fertilizer -AND -1-2 cups of Hoss Micro-Boost Micronutrient Supplement per 15 ft. of row.

Bean Pest & Disease Protection

Insects

Organic Controls

Garden Insect Spray 
Thrips, Army Worms, leaf miners

Horticultural Oil 
Aphids, Stinkbugs, Flea Beetle, Whiteflies, Spider Mites

Bug Buster-O 
Aphids, Flea Beetle, Whiteflies

Monterey BT 
Armyworms

Take Down Garden Spray 
Aphids, Army Worms, Flea Beetle, Whiteflies

Diatomaceous Earth – Cutworms

Non-Organic Controls

Bug buster ll
Aphids, Horn Worms, Stinkbugs, Flea Beetle, Whiteflies, Spider Mites, Thrips and leaf Miner

Treat as needed using label instructions.

Common Diseases

Organic Controls

Crop rotation and select resistant varieties
Fusarium Root Rot, Bacterial Blight, Mosaic

Non-Organic Controls

Liquid cop
Bacterial Blight

Garden Phos
Pythium, Downy Mildew, Powdery Mildew

Fungi Max
Rust

Vegetable, Flower, Fruit and Ornamental Fungicide
Rust, Botrytis Blight, Gray Mold

Treat as needed using label instructions.

Harvesting, Preserving, and Storing Beans

Harvesting Beans

Depending on the variety of beans you are growing, whether it be bush beans or pole beans, harvesting is relatively simple. The only real variations are how often you pick the beans through the season and at what stage of maturity. To harvest snap beans or fresh shelling beans, simply grab the pod where it connects to the vine and snap it from there. Be careful not to damage the bean itself and be sure to inspect pods for any diseases or pests. If you see any compromised pods, be sure to discard them to avoid any issues while storing.

The Best Time to Harvest Beans

Bush beans have a shorter period of production so you will get a larger harvest at once, making them ideal for canning and storing. While bush beans will continue to produce after harvesting, the crop will typically degrade which is why a lot of gardeners pull up bush bean plants after they’ve stopped producing and, if time allows, will replant a succession crop. Pole beans, however, have a longer period of growth and can be picked throughout the growing season, giving you the benefit of being able to harvest only how much you need at that time. These plants will continue to produce again and again after harvesting until they are killed off by frost or intense heat, depending on your zone.

Storing and Preserving Beans Properly

When preserving beans, you have to be extremely careful when deciding to can beans for long-term storage. Beans are the most common cause of botulism poisoning due to improper canning techniques. When deciding to grow beans and can them, make sure that you follow the canning instructions and use the right equipment like a pressure canner.  If you don’t have the proper equipment, pickling beans is a good option because the acid from the vinegar will kill any potentially harmful bacteria. If pickling isn’t precisely what you had in mind, freezing your homegrown beans is also a safe storage method.

Come See Our Beans!

Bean Growing Tips & Tricks

Don't Throw Out The Leftovers!

As you’ve learned, legumes (beans) are an extremely good source of Nitrogen, a vital part of good, healthy soil. Once you’ve harvested all of your beans, add the rest of the plant, stems, leaves, and all, to your compost pile. These nutrient-rich plants added to compost help make a great alternative to inorganic fertilizers. But be careful not to add any plants that you suspect have been infected with diseases or pests.

Pick Your Beans In The Afternoon

Diseases like blight and bacterial brown spot are typically spread more easily when plants are wet. Picking your beans in the afternoon after the morning dew has had time to evaporate will help keep any potential diseases from more easily spreading and infecting your crop.

The Other Growth Habit

While beans can be typically classified as pole beans or bush beans, there’s another growth habit to mention. Half runner beans like the Mountaineer Half Runner Bean falls somewhere between those. They can be equal parts bush habit as well as have long vining runners that can benefit from being trellised. So if you’re having trouble deciding, the half runner beans may be a good option to try.

Planting Inspiration Green Beans

Cabbage Growing Guide

Cabbage Growing Guide

Cabbage is a nutritious, leafy green that is great addition for your home garden! This vegetable is densely packed with fiber and rich with Vitamin C and Vitamin K. From coleslaw to Kimchi, cabbage is a versatile vegetable that can be prepared in many ways! 
Read more
Lettuce Growing Guide

Lettuce Growing Guide

The taste of a homegrown lettuce is unlike anything store-bought and is more densely packed with Vitamin A! This easy to grow cool season crop is a garden staple for beginners and experts alike.

Read more
Tobacco Growing Guide

Tobacco Growing Guide

Tobacco is a member of the Solanaceae or nightshade family. This family includes tomato, pepper, eggplant, Irish potato, and a number of other plants. Tobacco belongs to the genus Nicotiana, and almost all commercial tobacco is of the tabacum species. The Nicotiana rustica species was commonly used by...
Read more